Configuration
NB! This needs to be in configuration.yaml, not in a "package".
HACS uses the GitHub API to gather information.
Without a valid token, HACS will not start.
Example configuration
hacs:
  token: d73jds8f73jkr9d8sufv2br8sd9fy92nr9f80u23r97fhse (Don't copy+paste this token, create your own)
| key | optional | default | description |
|---|---|---|---|
token |
False | A Github Personal Access Token | |
sidepanel_title |
True | Community | The name used for the sidepanel link. |
sidepanel_icon |
True | "mdi:alpha-c-box" | The icon used for the sidepanel link. |
appdaemon |
True | False |
Enable tracking of AppDaemon apps. |
python_script |
True | False |
Enable tracking of python scripts. |
theme |
True | False |
Enable tracking of themes. |
After adding it to the configuration you need to restart Home Assistant.
Github Personal Access Token
The token generated below will only have read-only access to public information.
You need to generate an Access Token to your account before you start using this.
Step 1 - Open browser
You are probably looking at this in a browser, so we can probably check this off.
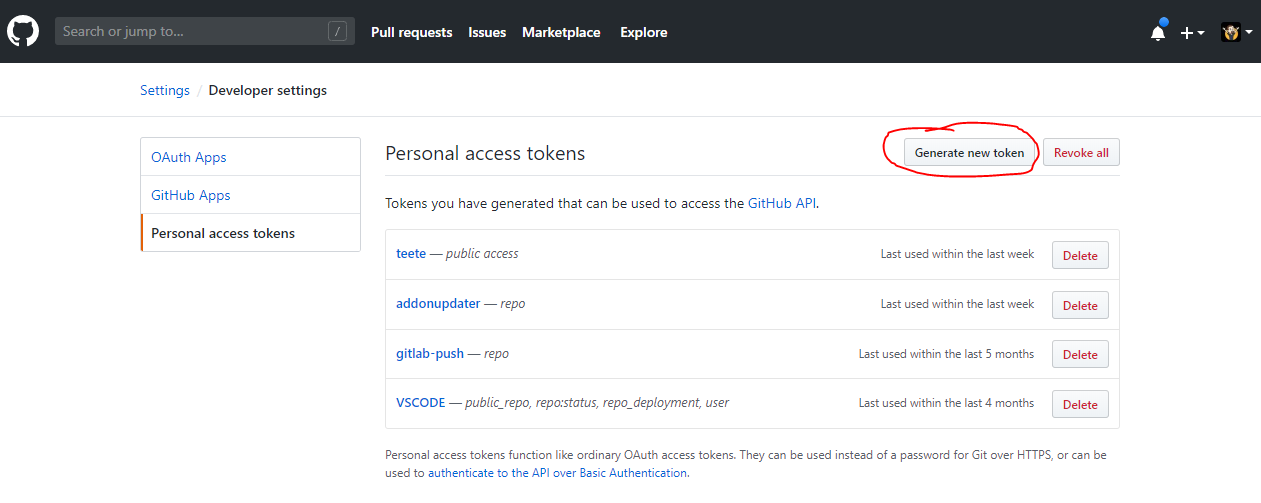
Step 2 - Go to your GitHub "Developer settings"
And then "Personal access tokens." or click here: https://github.com/settings/tokens
Step 3 - Start generation
Click the "Generate new token" button.

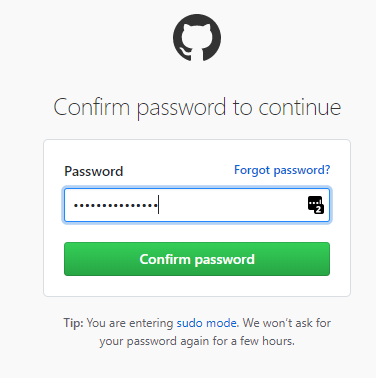
If you are asked to login, do so.

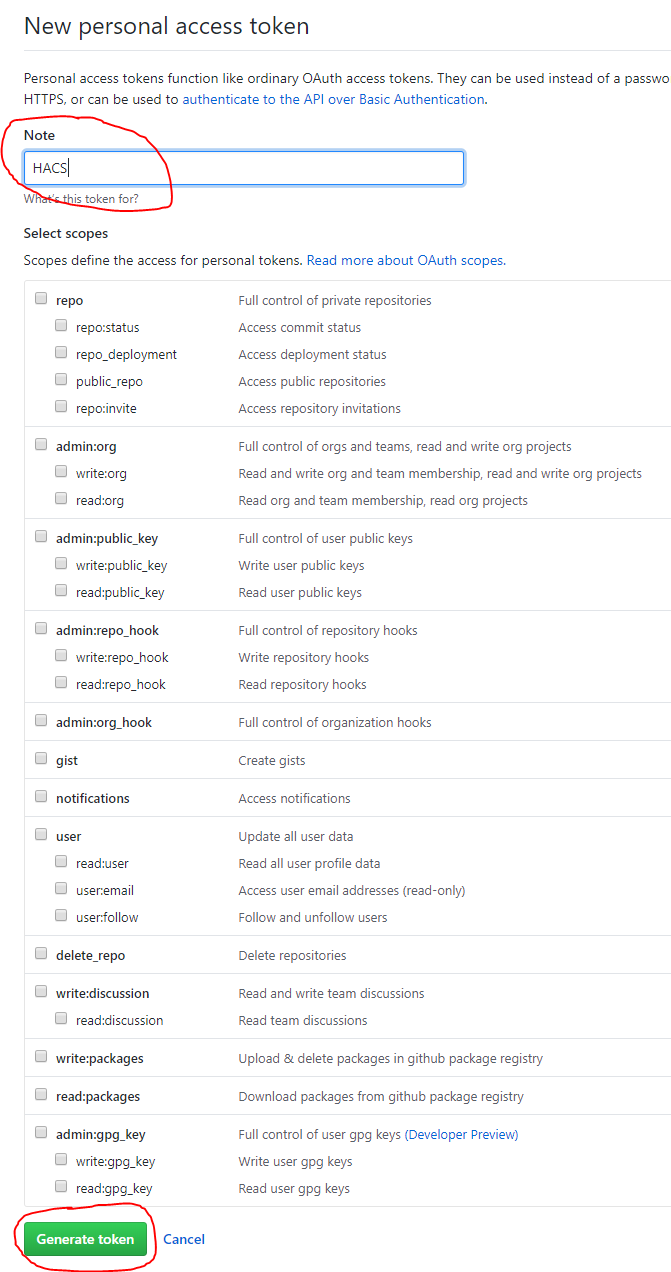
Step 4 - Choices
First give it a logical name so that you can recognize it.
Then click the "Generate token" button at the bottom.
You do not need to check any of the boxes.

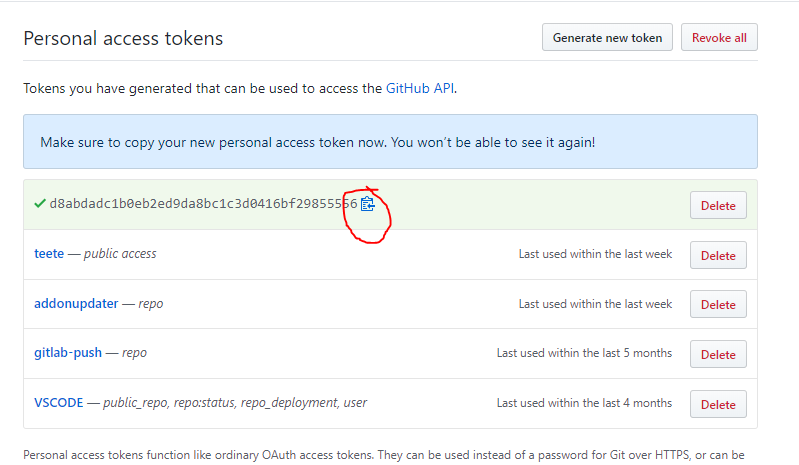
Step 5 - Copy
Now you see the generated token, this will be the only time you see it, make sure that you copy it manually or by clicking the clipboard icon.
